- What is Snowboard STANCER?
- Personal Information Input

Operation Method:
MEASUREMENT SCREEN
OPERATON METHOD
-
①Starting Page
-
②Data Entry Page
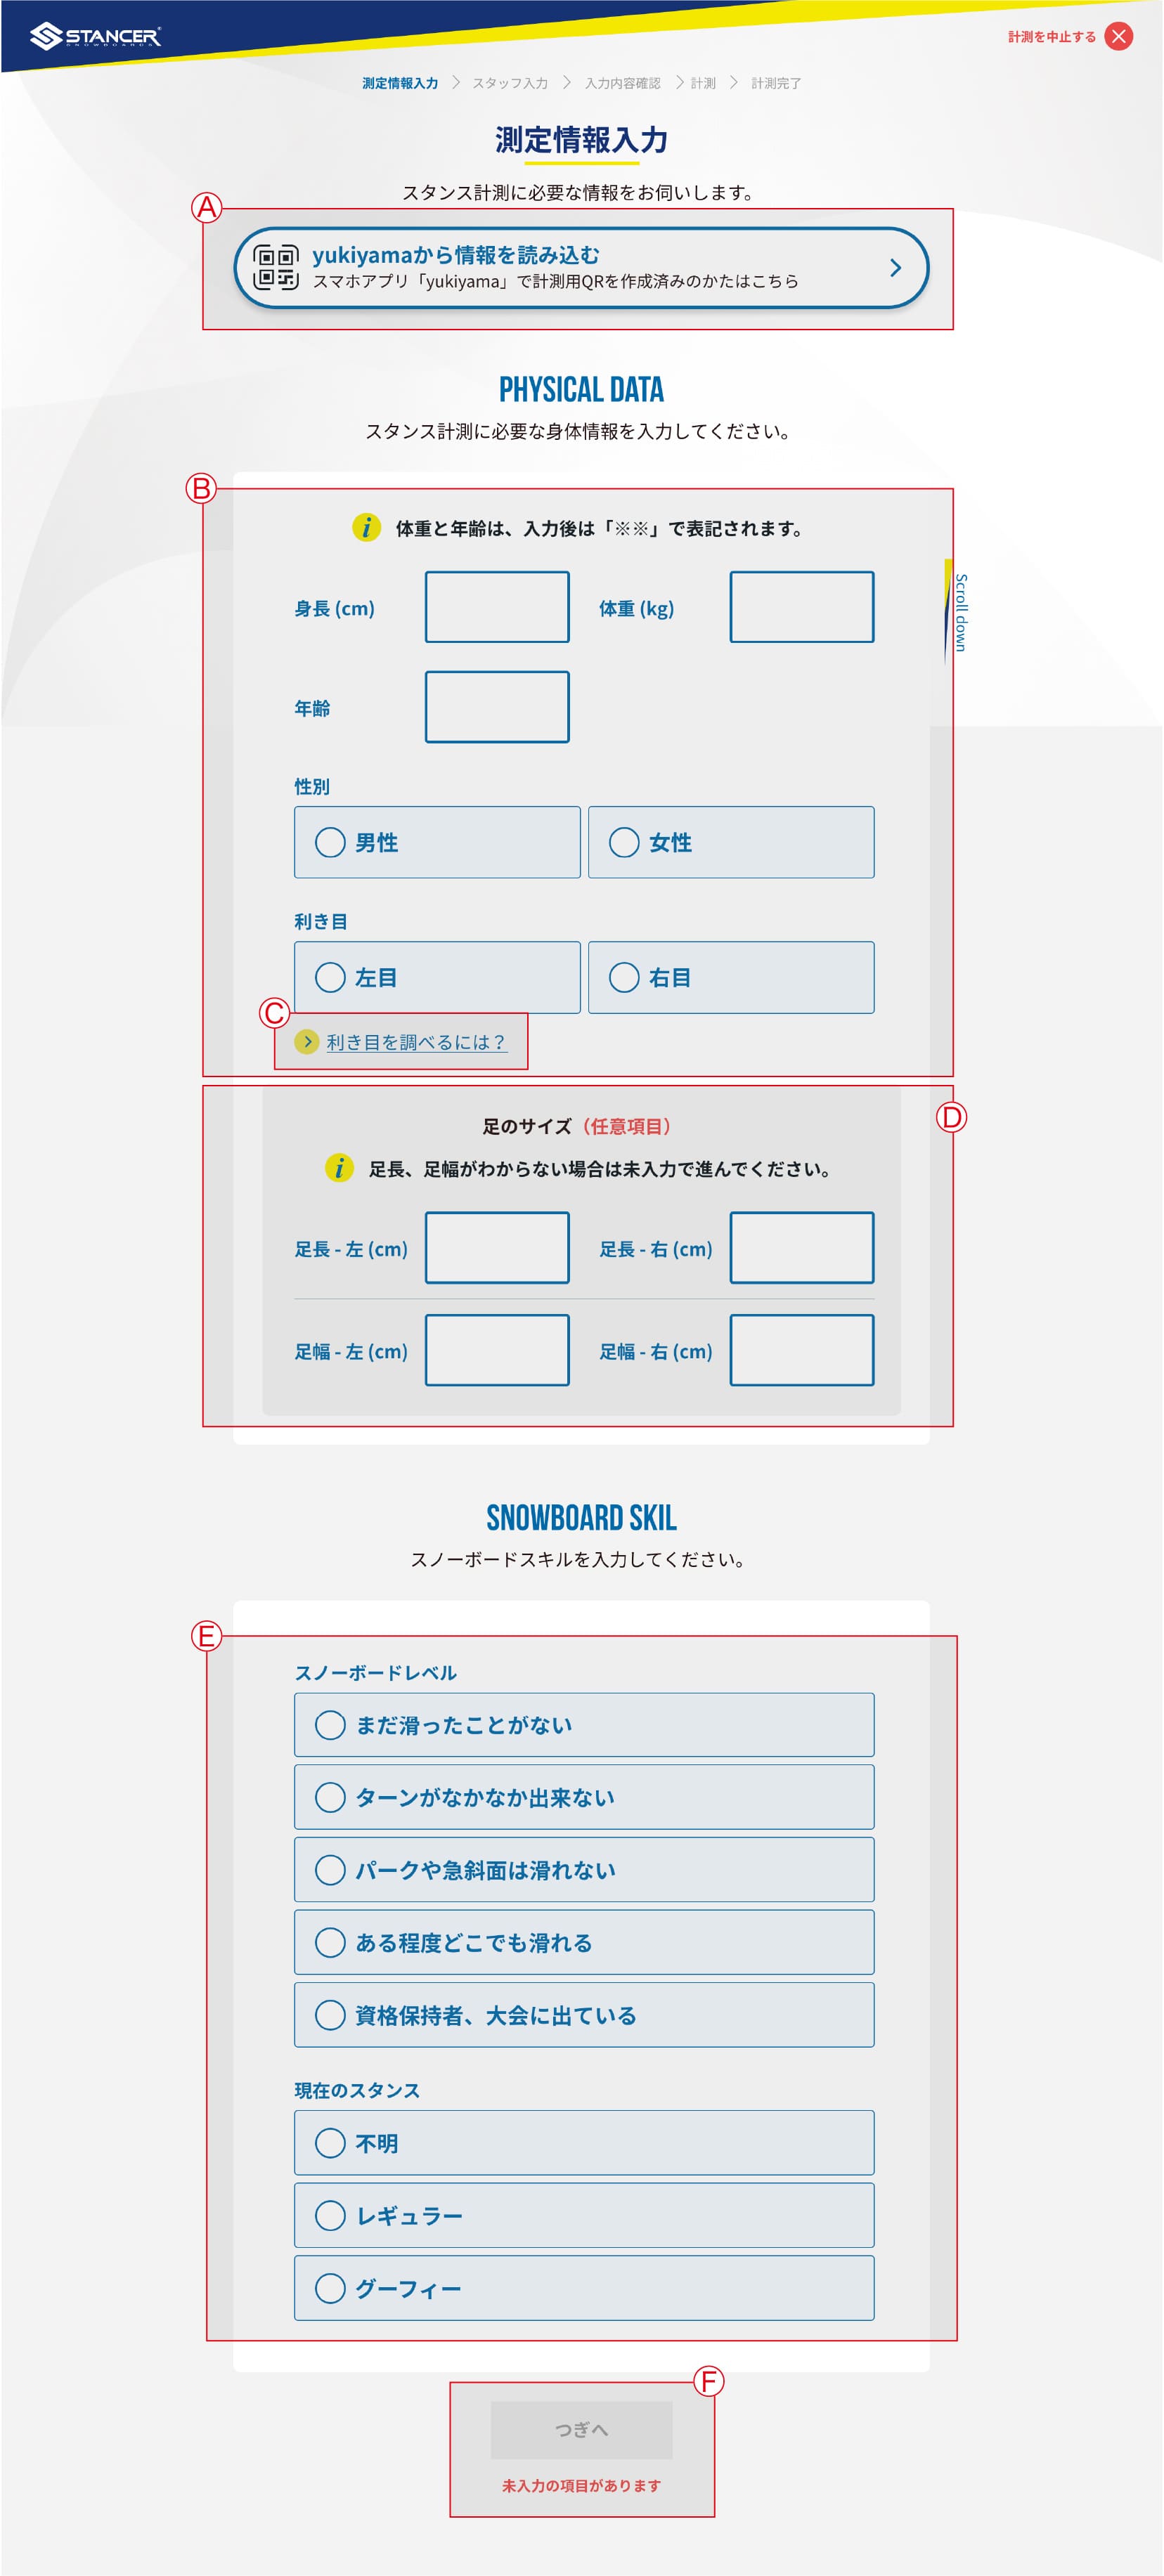
Ⓐ You can save personal data within the "stance.lab" feature of the yukiyama application and transfer it as a QR CODE. When using the STANCER for testing, you can scan the QR CODE to directly import the saved content, thus avoiding the need to re-enter personal information with each measurement.
Ⓑ Please enter your personal information.
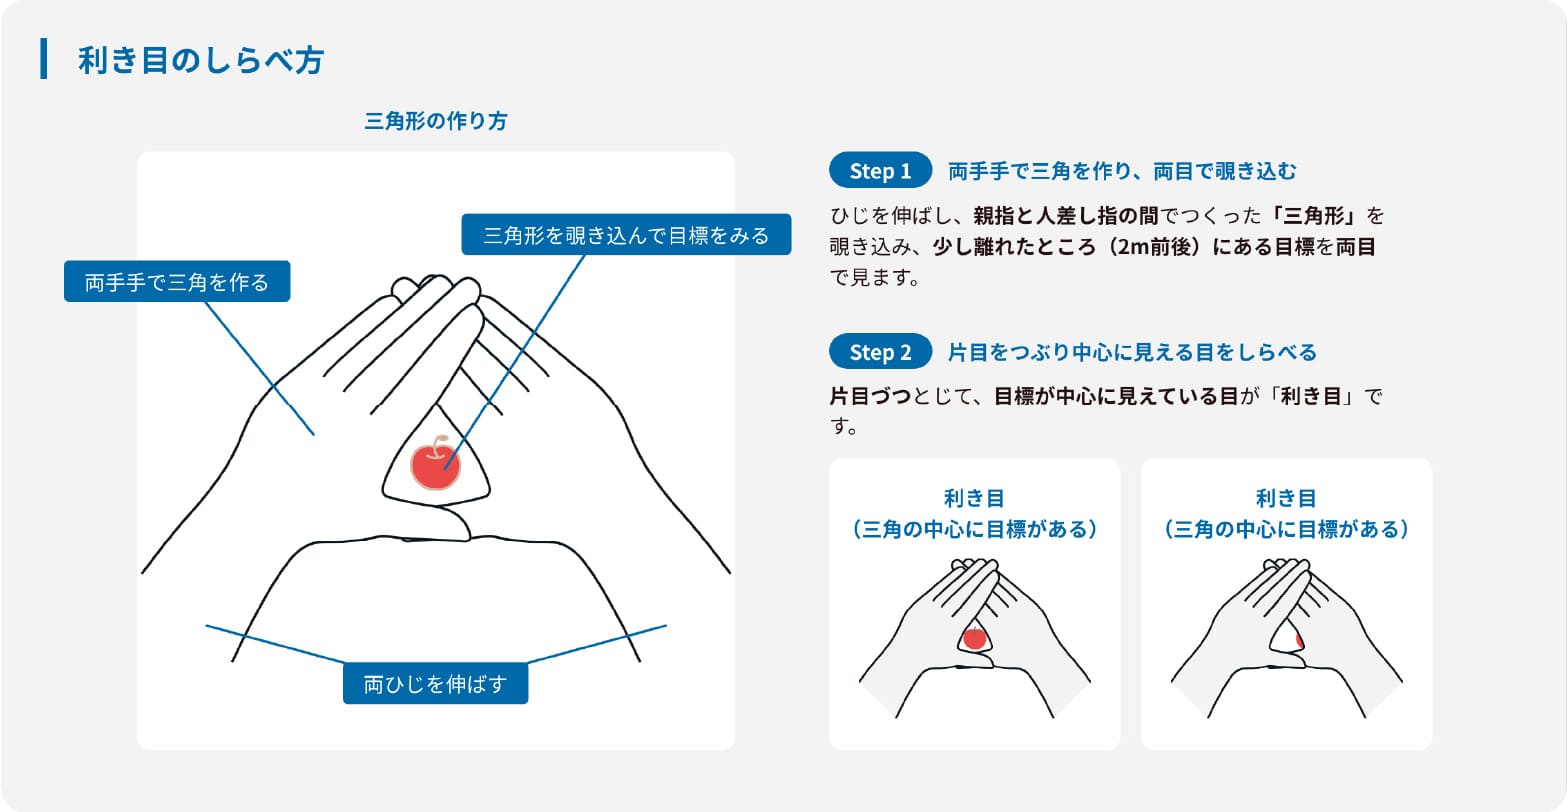
Weight and age won't be directly displayed after input but will be used for calculations during the measurement.Ⓒ If you are unsure about determining your dominant eye, you can refer to this section.
Ⓓ Please enter your physical details.
Enter your actual barefoot length and barefoot width.
※ Barefoot length is mandatory, while barefoot width is optional. You can proceed with the test even if it's not filled out.Ⓔ Please select your snowboarding skills and experience.
Ⓕ Once all the data has been entered, please press the "Next" button and hand over the tablet to the staff.
-
③Staff Input
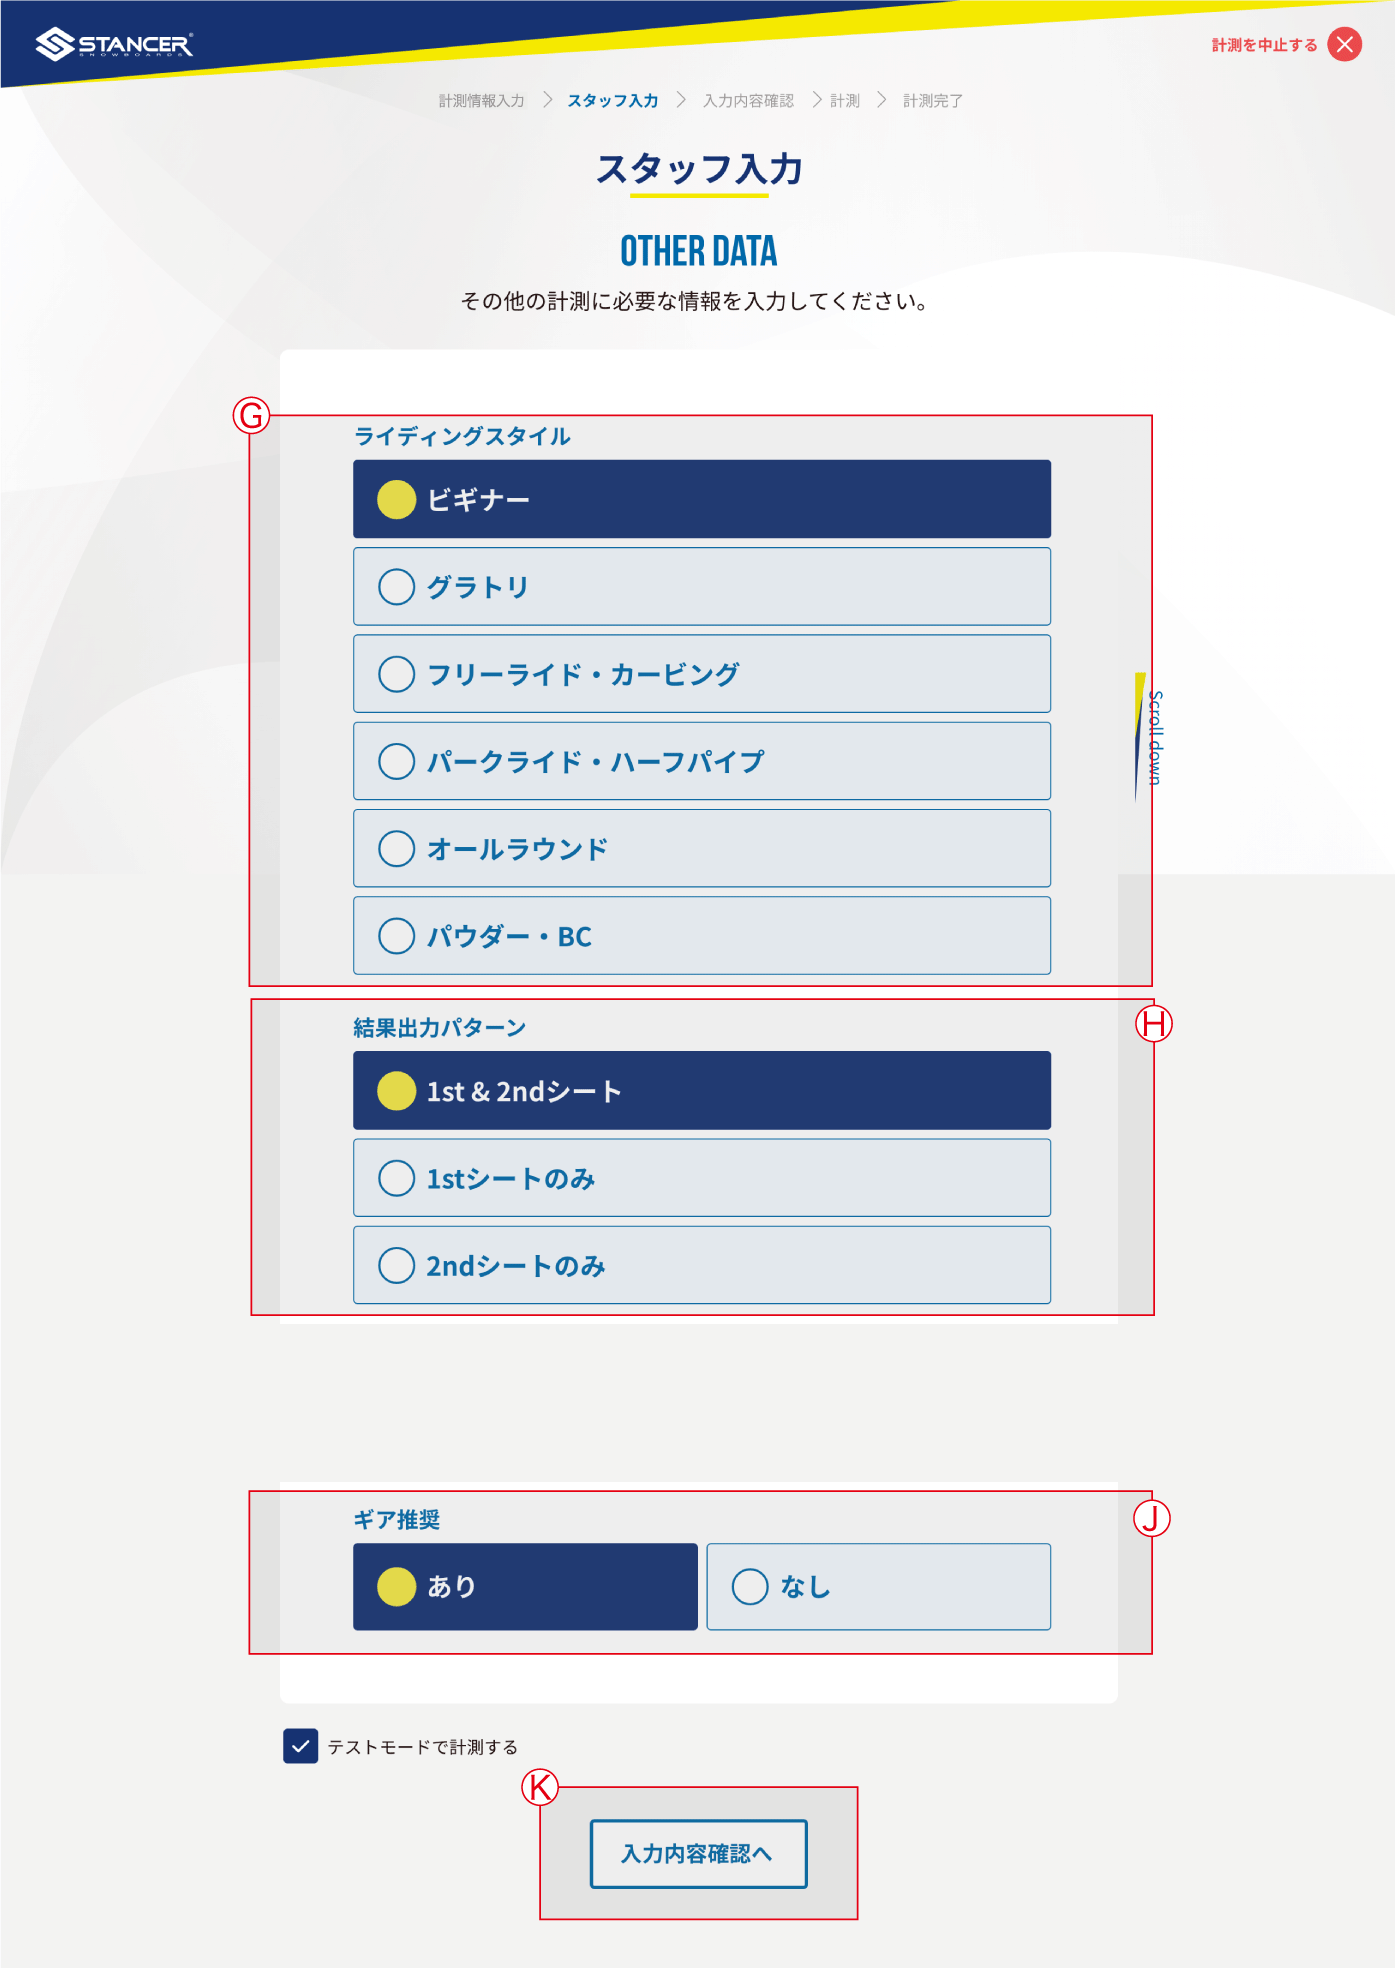
Ⓖ Please select your preferred style and preference, which will be used to calculate the recommended stance setting for this measurement.
※ Besides the style selected here, recommendations for other styles can be found within the "stance.lab" feature of the yukiyama application.Ⓗ Please choose the output mode for this test.
Both 1st sheet and 2nd sheet (1,800 yen excluding tax). This is the default standard measurement.
・Only the first sheet (1,000 yen excluding tax). This option is typically chosen when store staff needs only the equipment setup data to assist customers. In this case, it is not possible to output or save the QRCode linked with stance.lab.
・Only the second sheet (1,000 yen excluding tax). This is typically provided in season and can be chosen by customers who have already completed at least one standard measurement. Please provide the store staff with your previous STANCER standard test results PDF or electronic results from stance.lab.Ⓙ Choose whether to print recommended equipment details.
By default, equipment recommendations are provided, but if you already have your own snowboard, or if you don't need equipment recommendations, you can choose not to receive them.Ⓚ After completing input and selections, click this button to navigate to the content confirmation screen.
-
④ Confirmation page
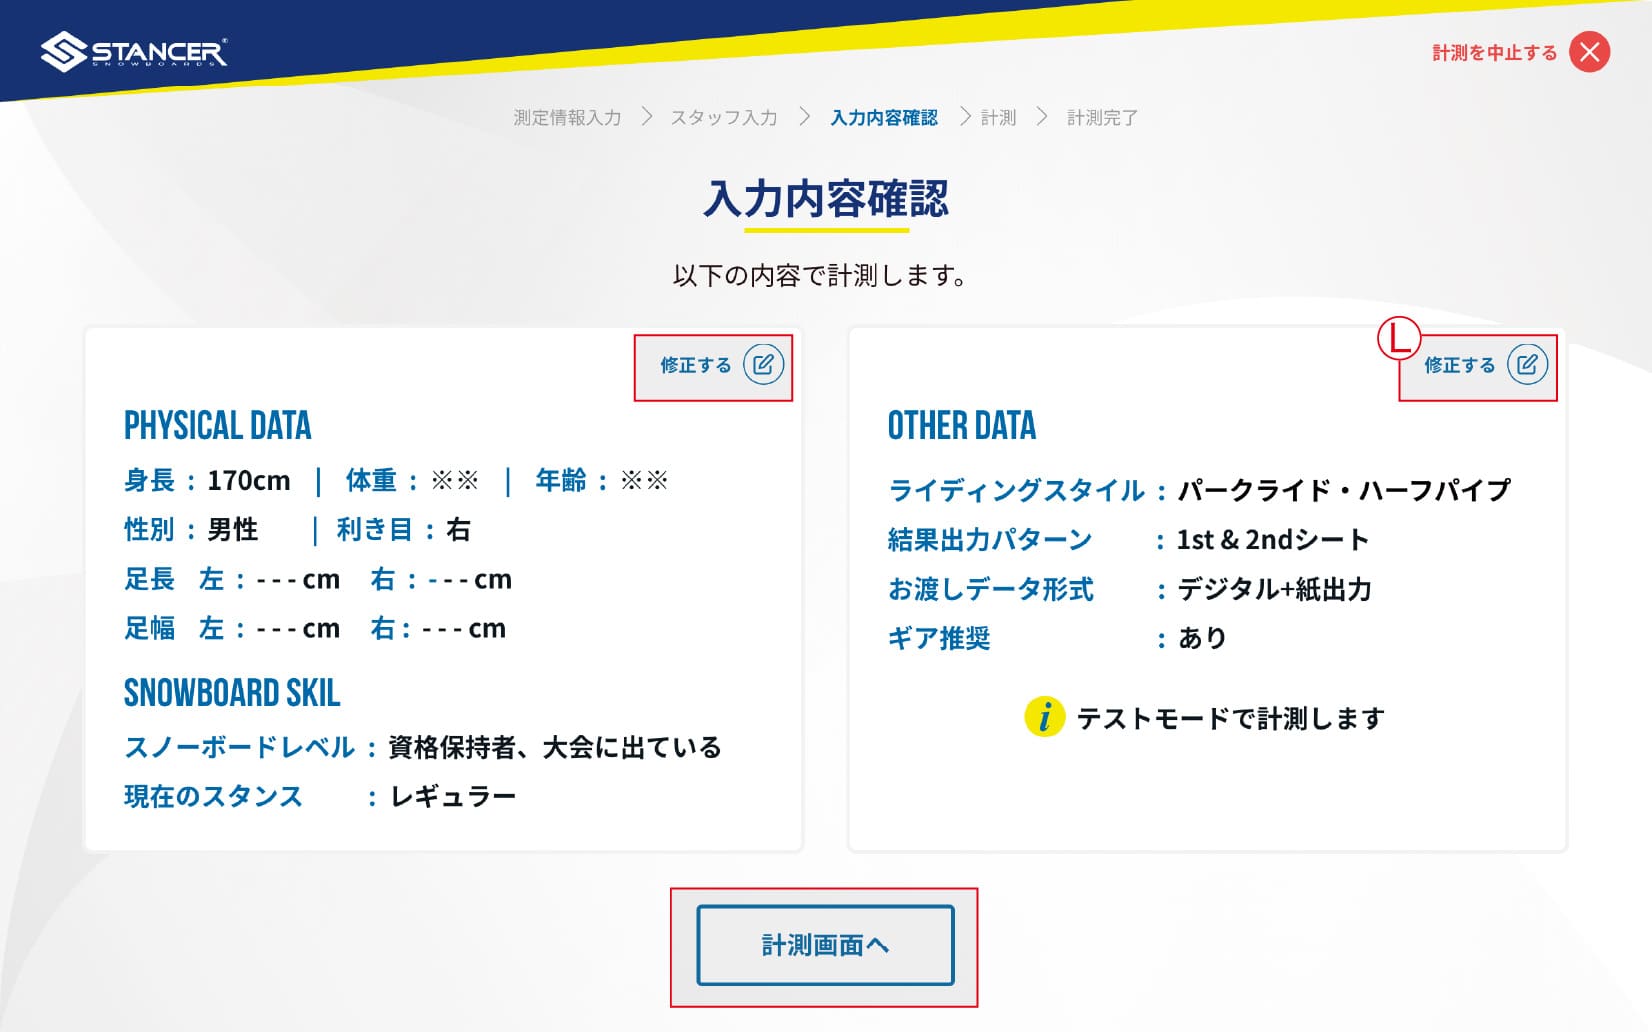
Ⓛ If any input or selections need to be modified, click this button to return and make changes.
Ⓜ If all inputs or selections are correct, click this button to proceed to the measurement page.
Ⓠ Pre-test Explanation 1
Ⓠ Pre-test Explanation 2
-
Ⓠ Pre-test Explanation 2
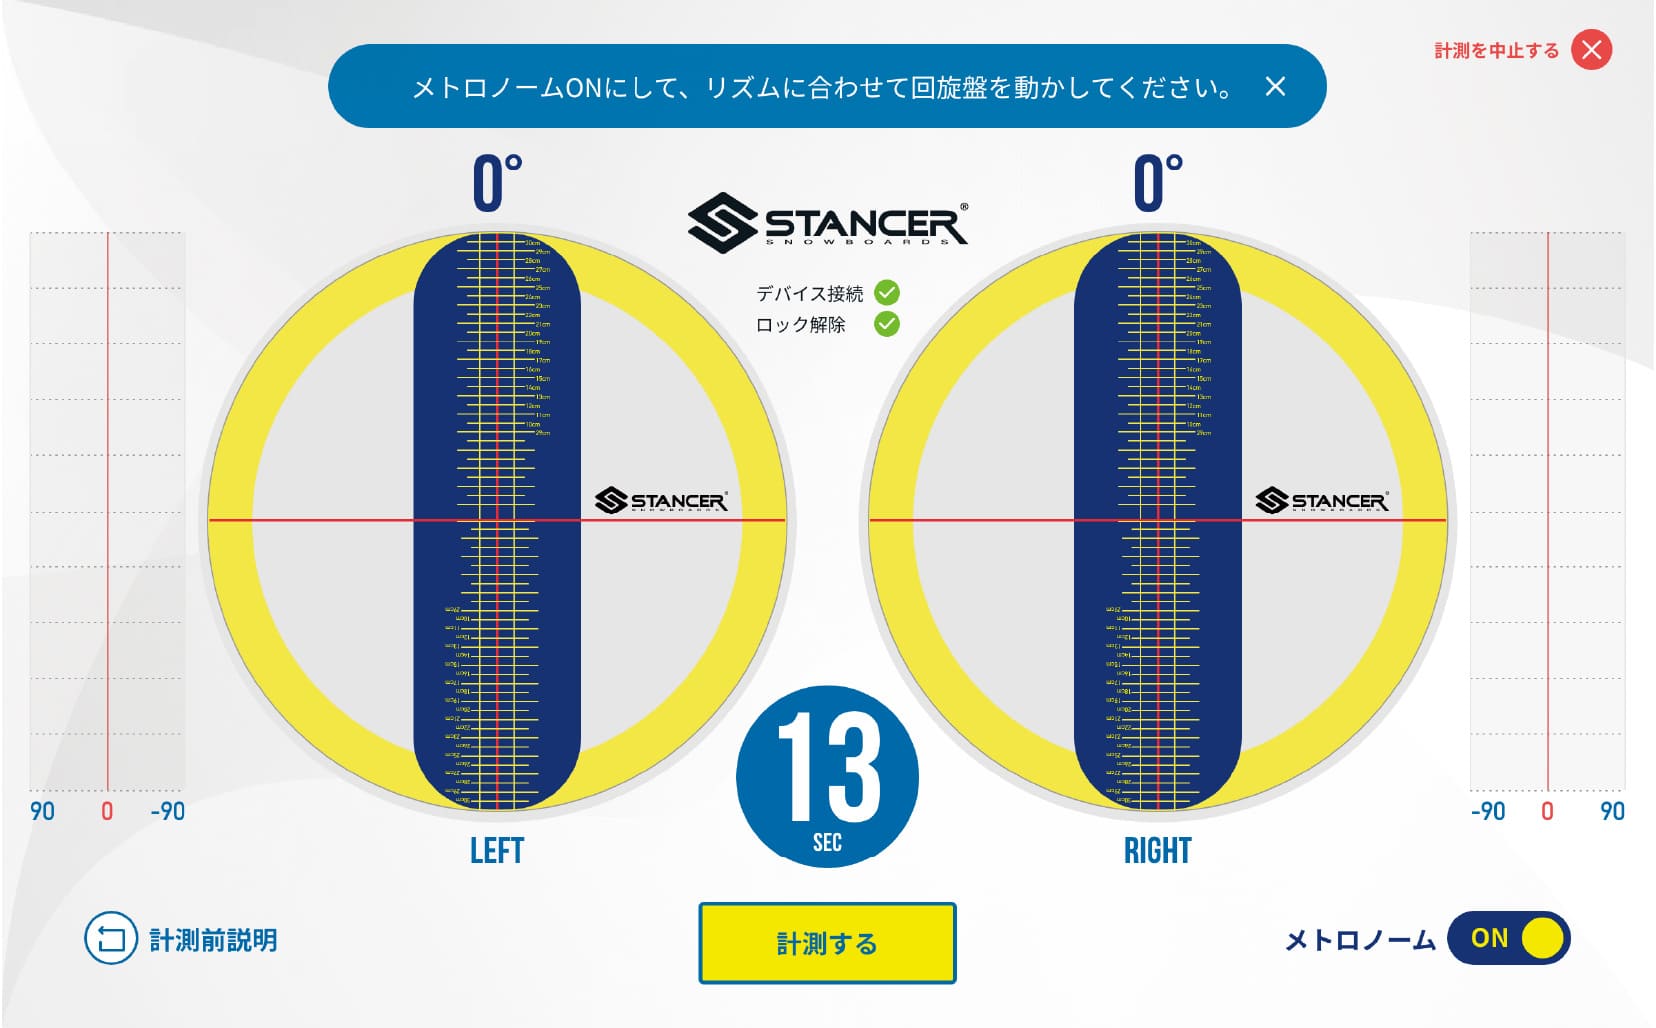
Ⓝ Before starting the measurment, please turn on the alert sound which gives rhythmic cues for internal and external rotations. Before pressing the start test button, practice rotating in tune with this rhythm. Also, make sure to check the foot positioning and testing posture; for more details, refer to Q.
Ⓞ This is the start button for the test. Once pressed, a 13-second measurement will commence.
During these 13 seconds, internal and external rotation angles will be measured. If the rhythmic alert sound is not turned on or emitted, the start test button cannot be pressed.Ⓟ Displays the remaining measured time.
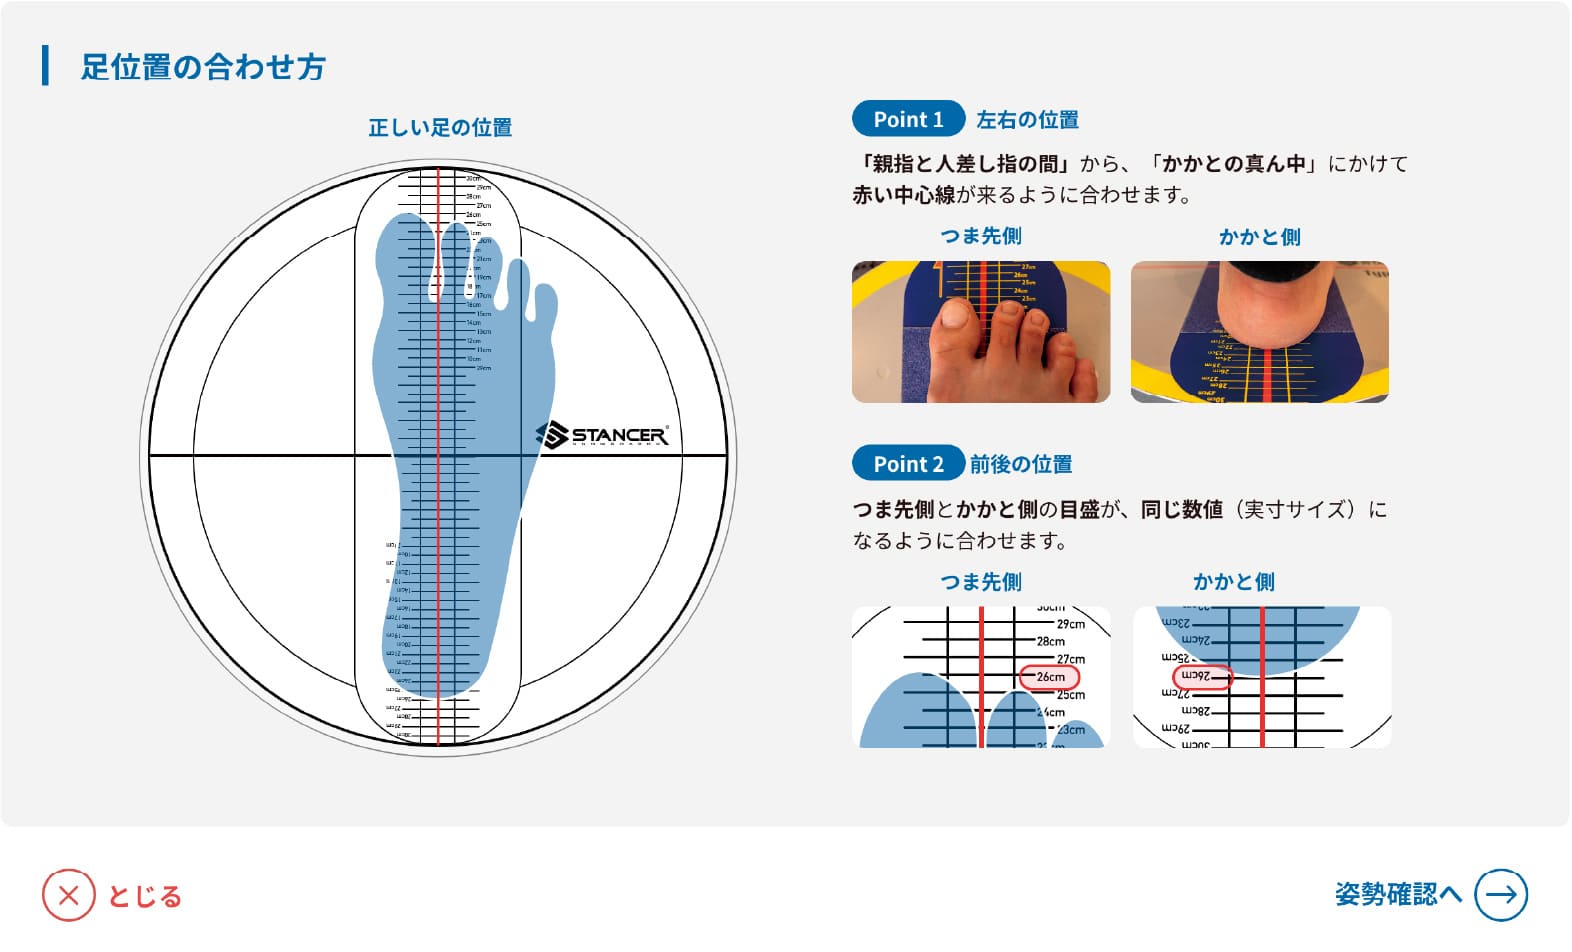
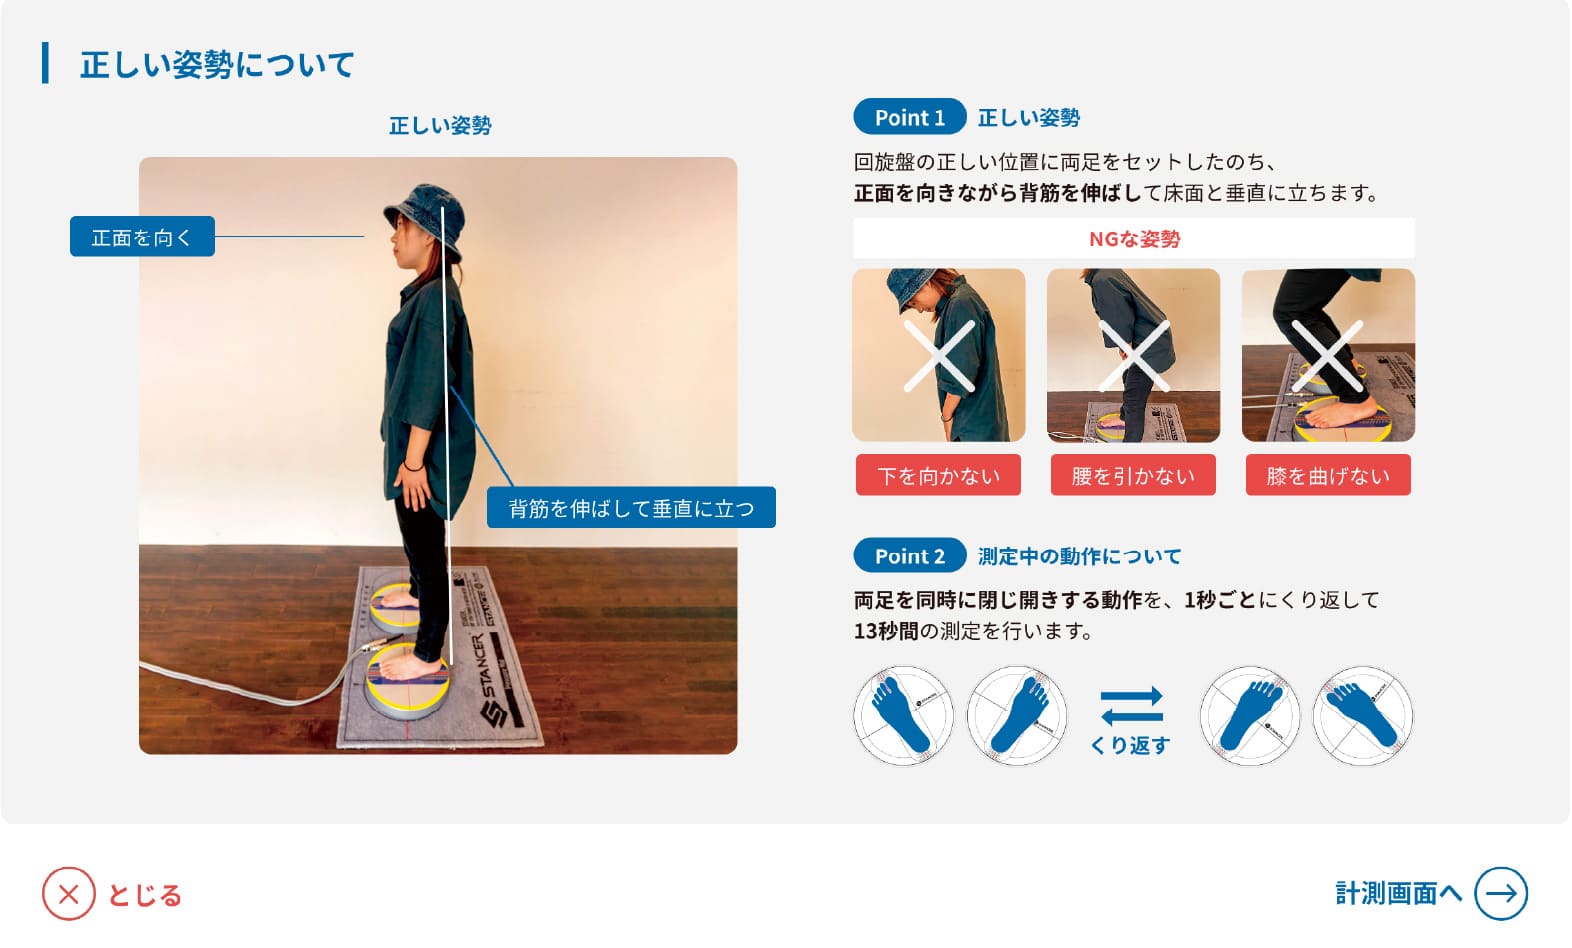
Ⓠ This page provides a detailed explanation regarding the foot position and the posture to be assumed during the test. If the foot positioning and posture are incorrect, the results might be inaccurate. Please ensure you check these before starting the test.
-
⑥ Test Page
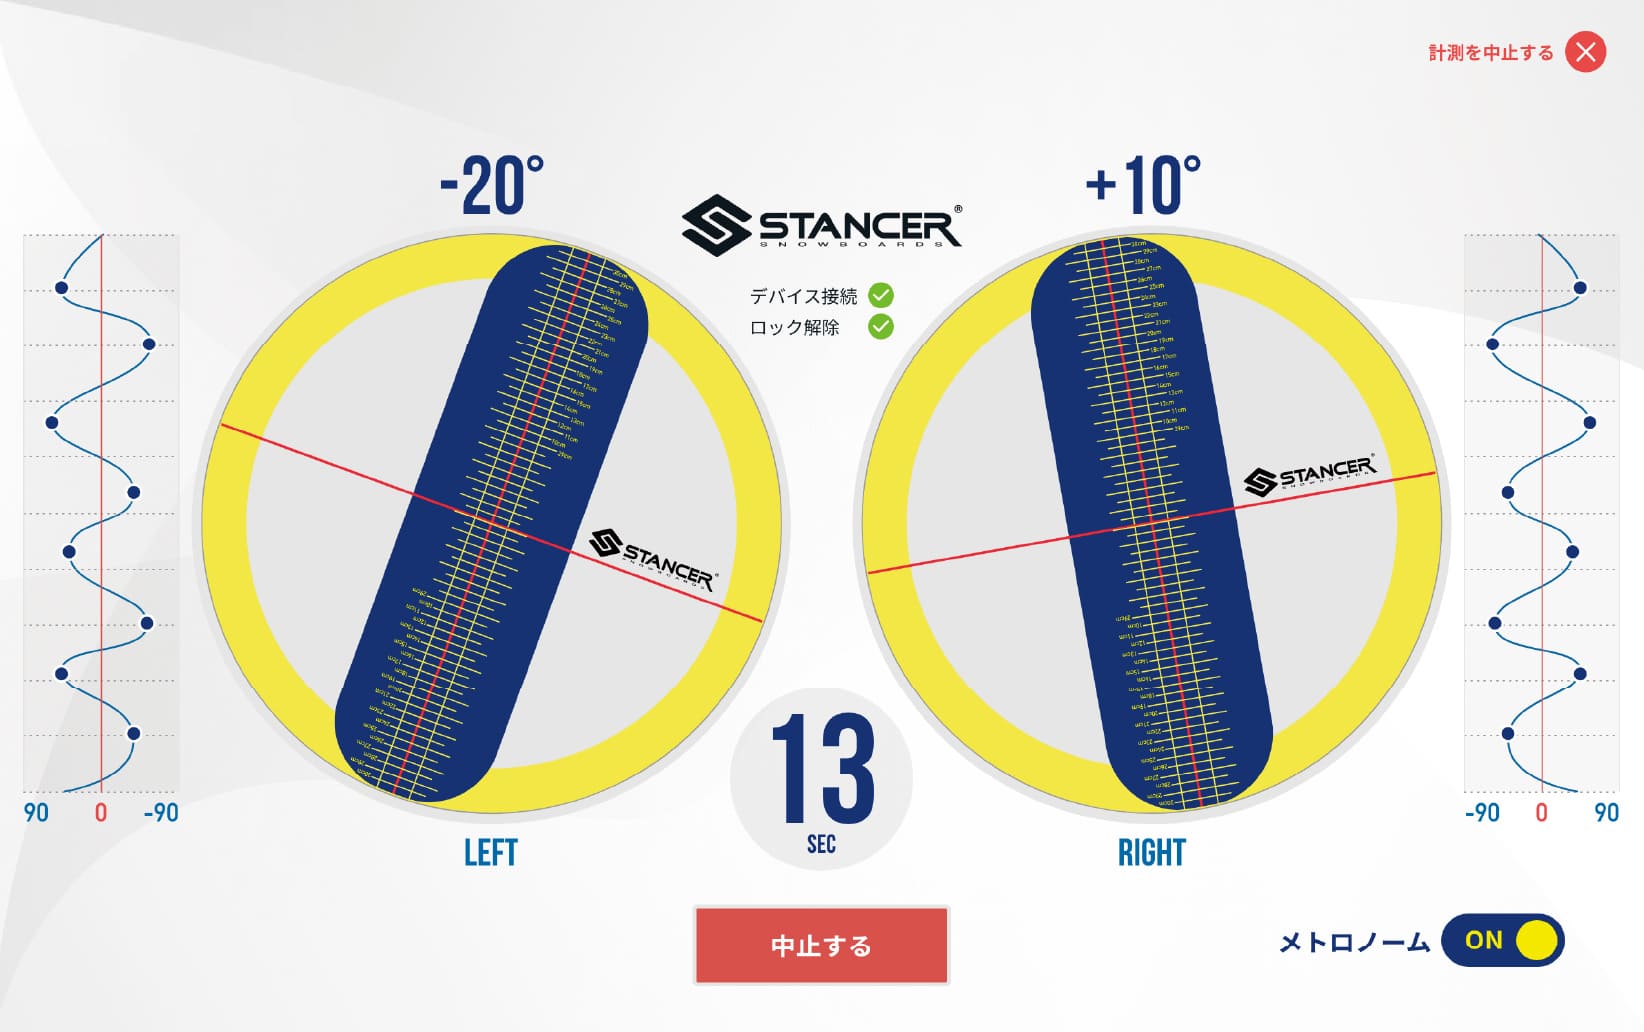
Ⓡ Button to abort the test.
Ⓢ Displays a real-time waveform graph of the current rotation being tested.
-
⑦ Test Finish page
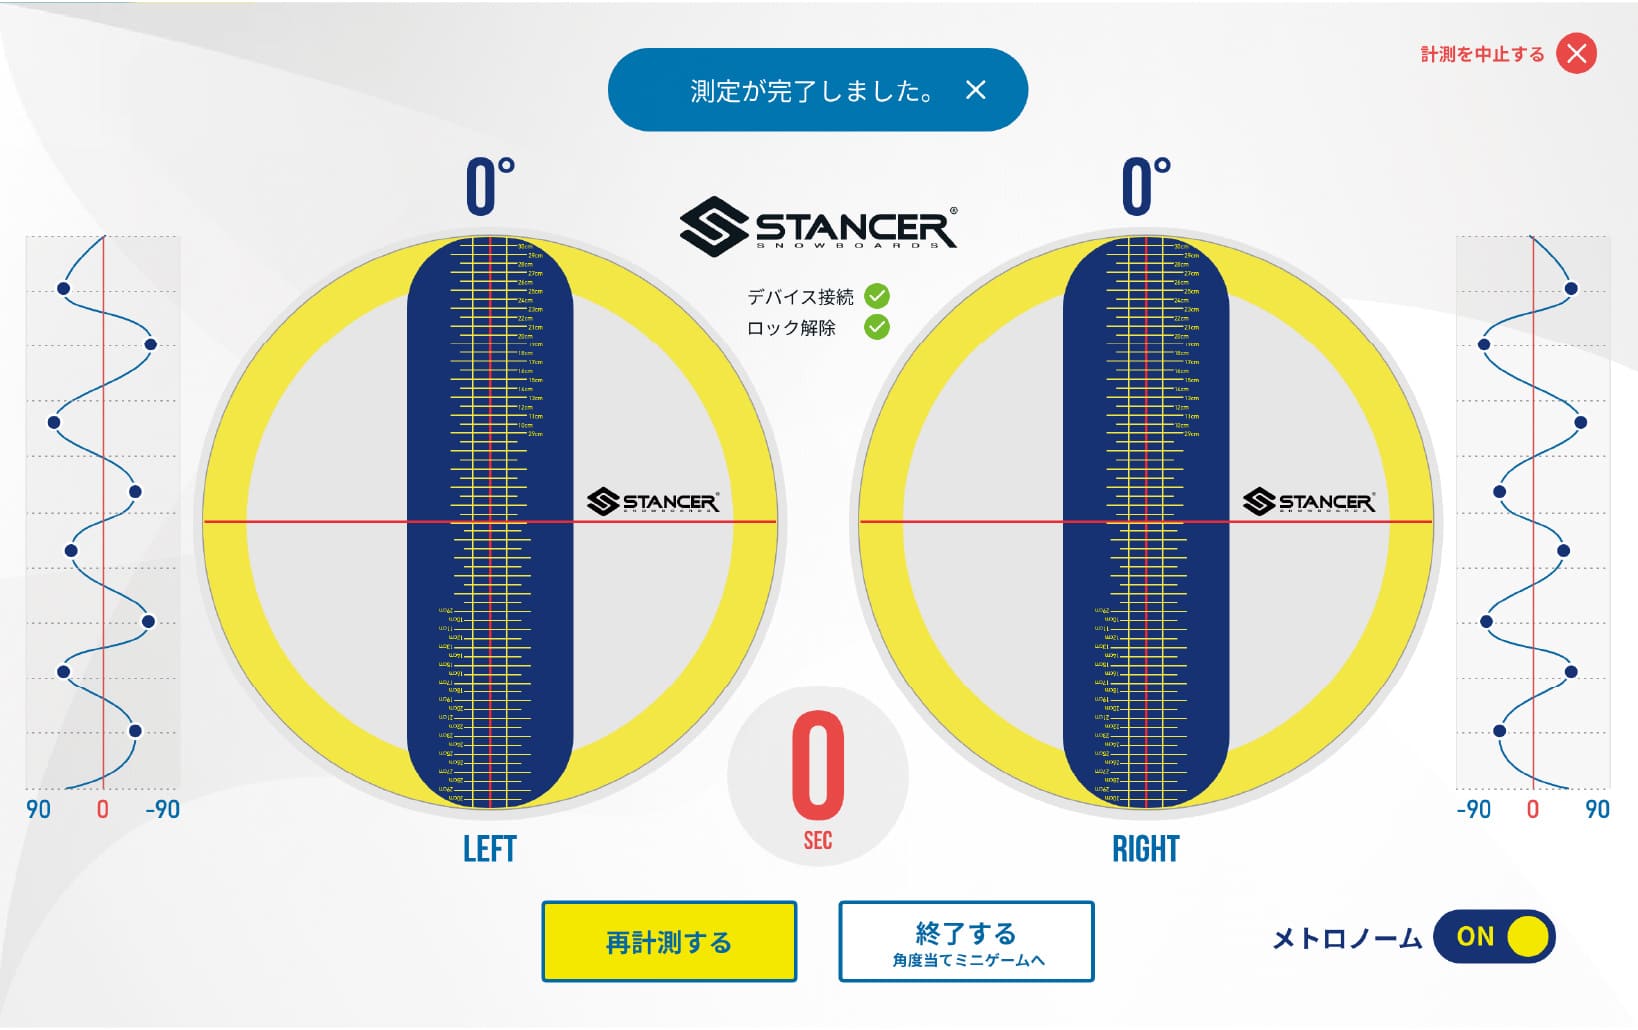
Ⓣ This button returns to the pre-test state if a retest is required after the initial test concludes. We will redo the test if there's any deviation in posture or foot positioning.
Ⓤ If the test is completed successfully, click this button to finish the measurement and proceed to the MINI GAME
-
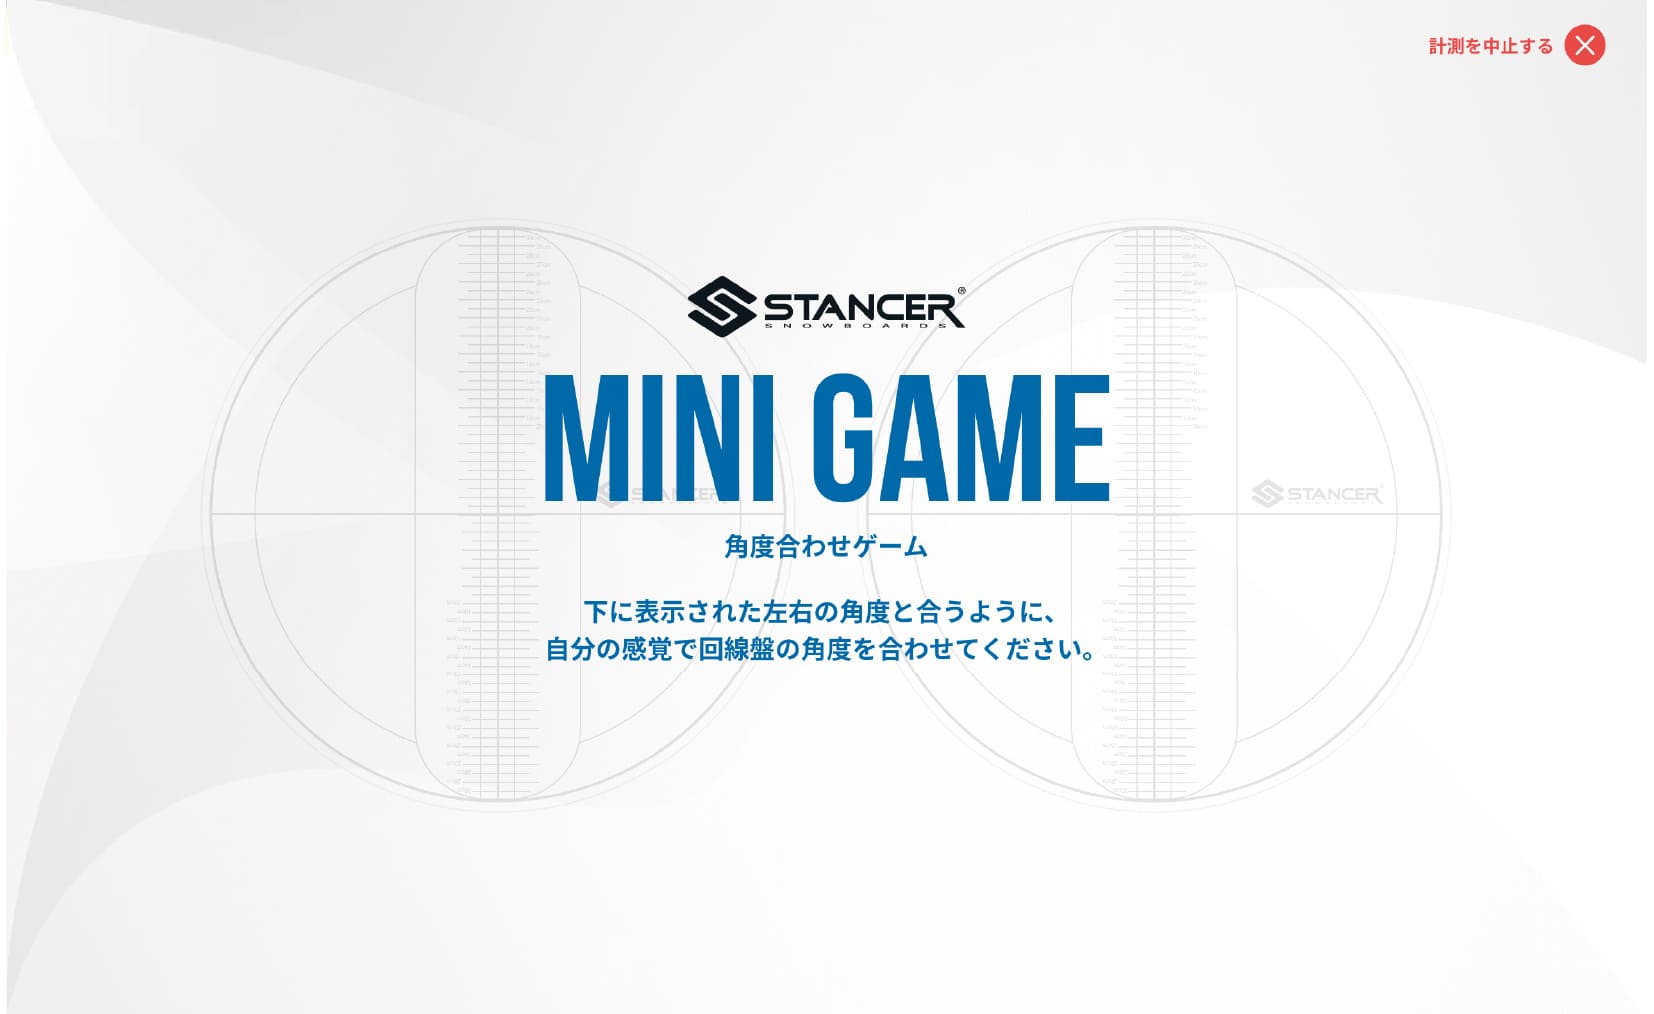
⑧ Mini Game Start Screen
-
⑨ Mini Game Screen
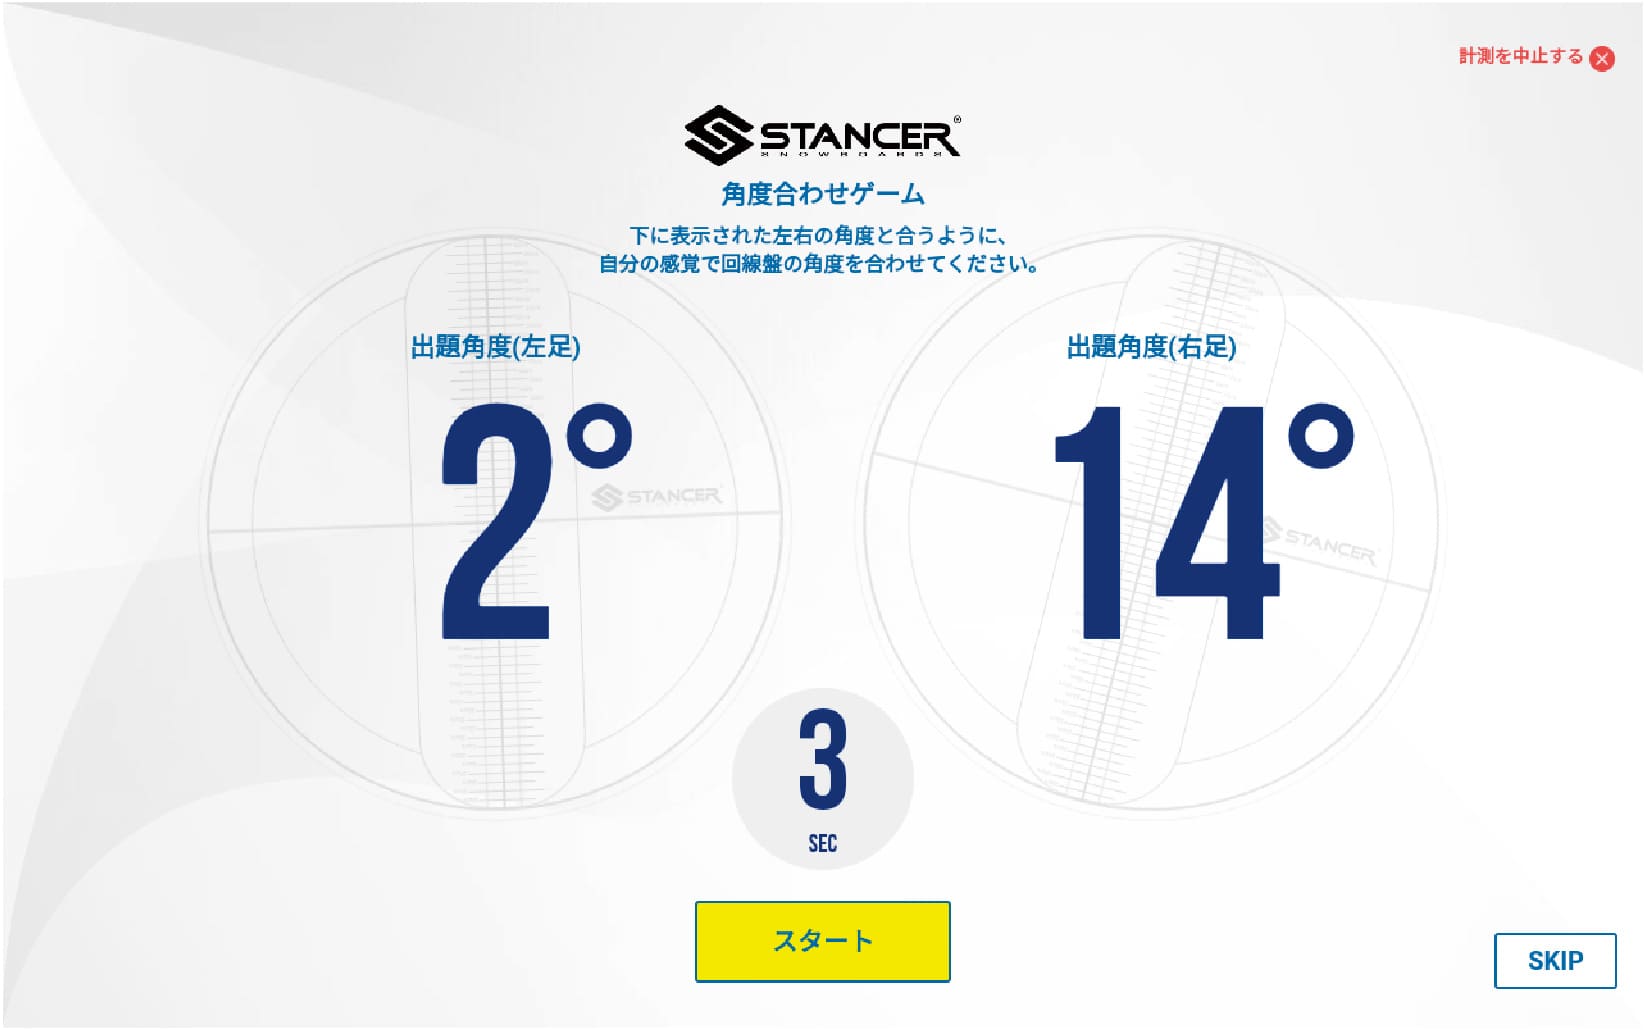
Ⓥ This is the button to start the Mini Game (Sensory Angle Mini Game). After pressing the button, the angle will be detected after 3 seconds, and it will automatically redirect to the game results.
Ⓦ Displays the remaining seconds before the angle detection. Once the start button is pressed, a 3-second countdown will begin.
Ⓧ This button allows users to skip the MINI GAME and go directly to the measured results.
Ⓨ Displays the targeted angle for the game, then rotate the STANCER disc to match the angle. The targeted angle will be randomly generated between 0 to 40 degrees.
Adjust the disc's position by rotating it to match the given angle, and see if you can achieve a perfect match.
If you successfully complete the challenge, the store will gift you a special souvenir!
Please take a screenshot of the completion screen and send it by direct message to SLAB's Twitter and Instagram accounts. -
⑩ Sensory Angle Mini Game End Screen
-
⑪ Sensory Angle Mini Game Result Screen (Failed)
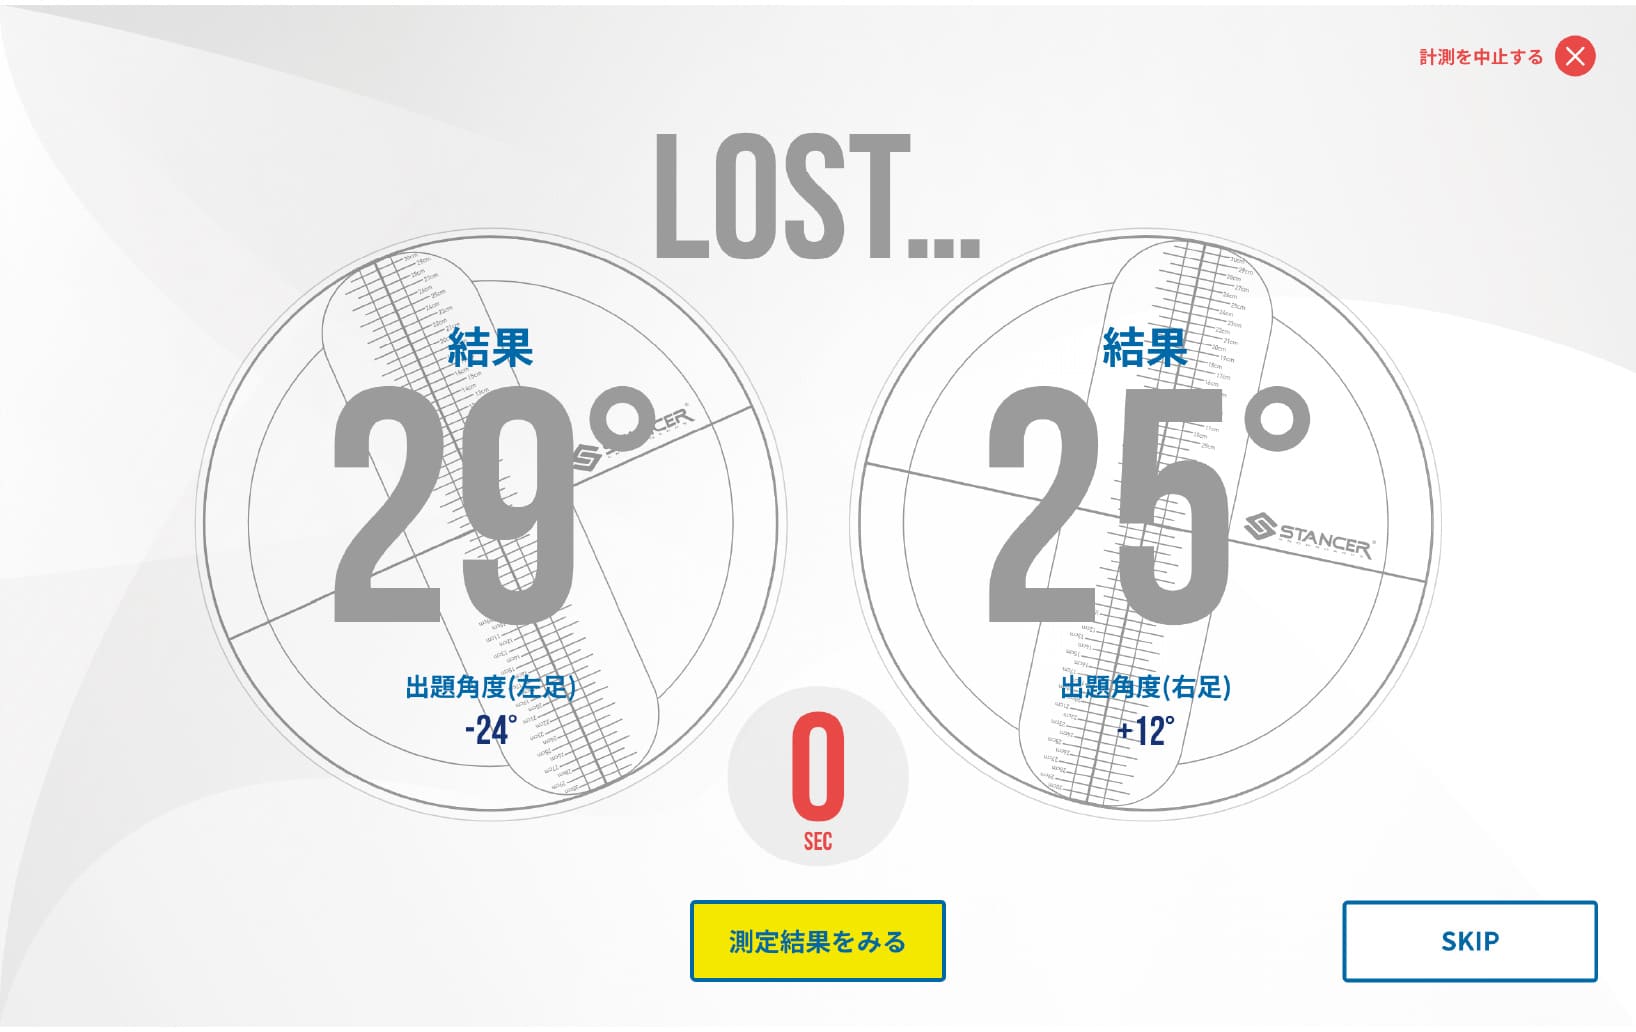
Ⓩ After the Sensory Angle Mini Game concludes, press this button to display the STANCER measured results.
⑪ Sensory Angle Mini Game Result Screen (Successful)
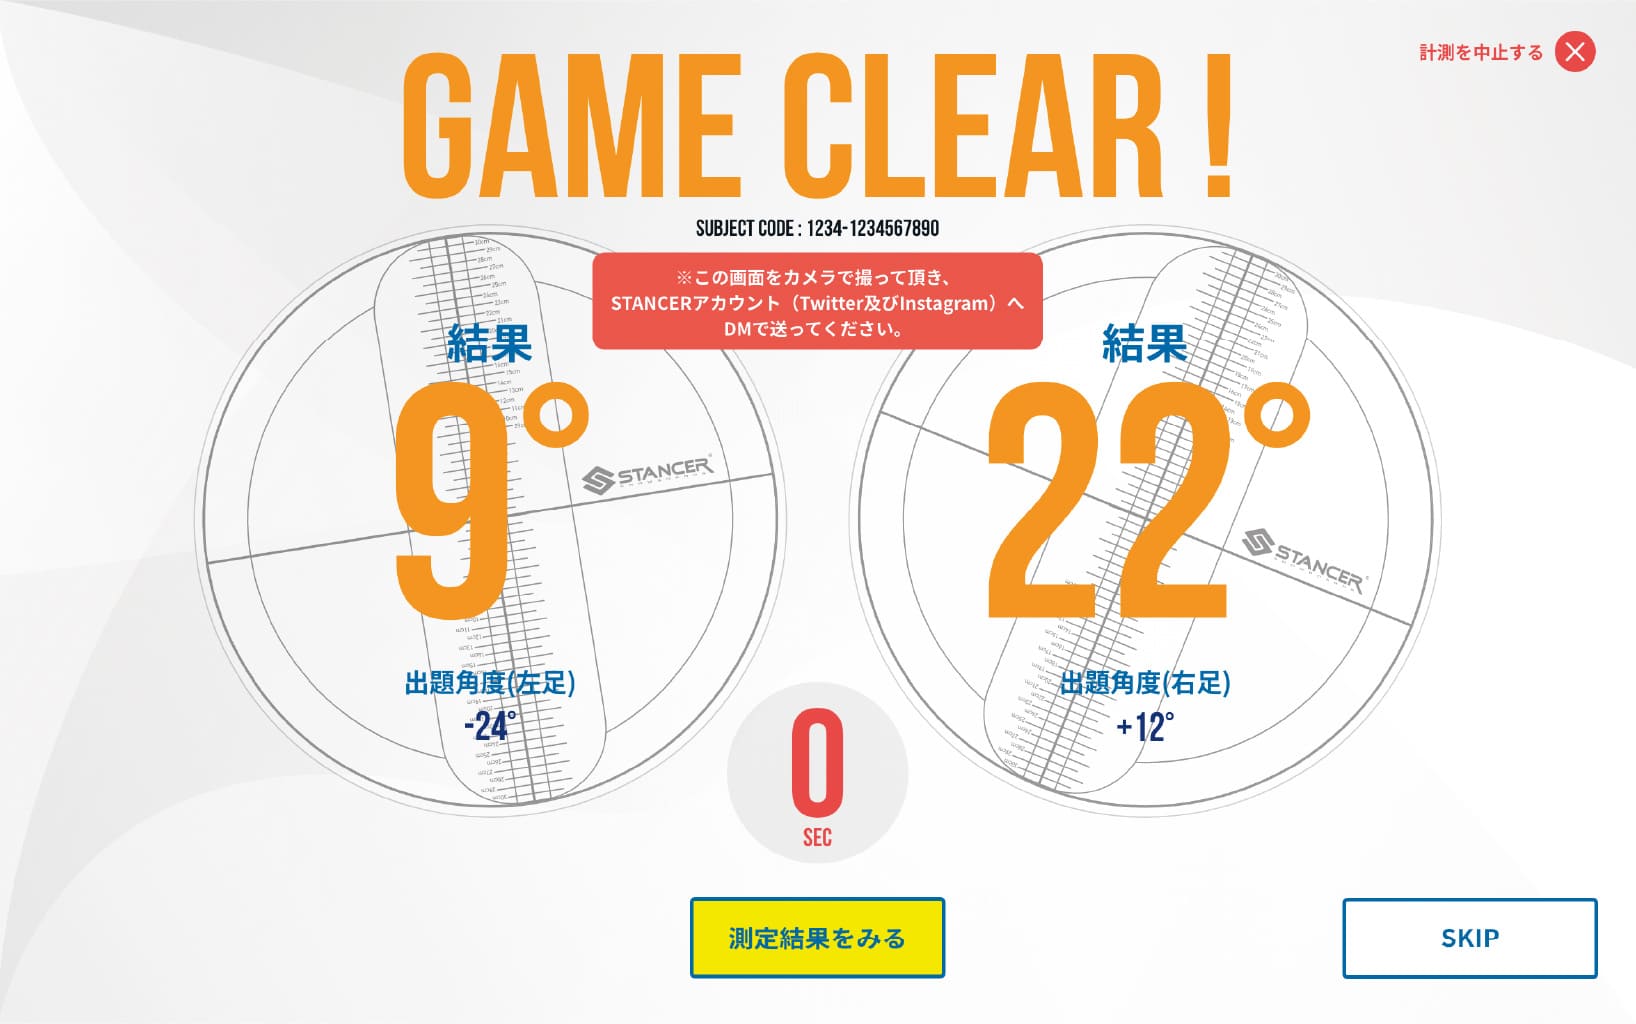
Ⓩ After the Sensory Angle Mini Game concludes, press this button to display the STANCER measured results.
-
⑫ Confirming measured Results (1st sheet and 2nd sheet)
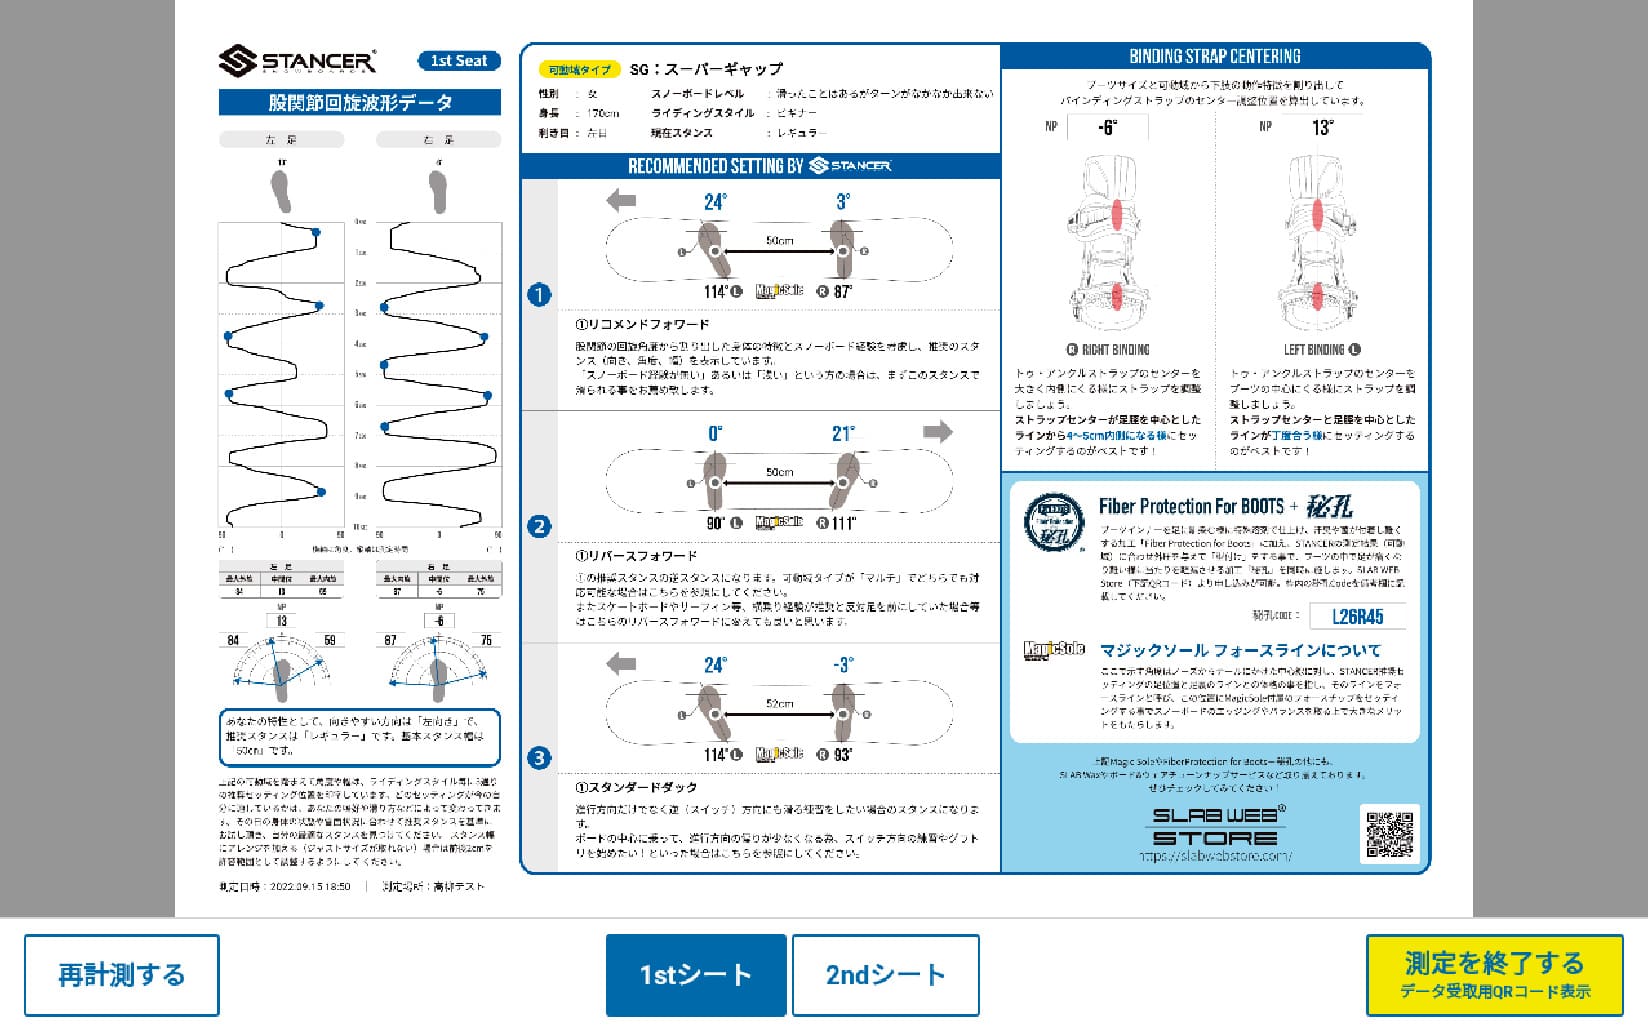
-
⑫ Confirming measured Results (1st sheet and 2nd sheet)
-
22/23 Update Explanation Video
-
22/23 Update Explanation Video